Step by Step Guide for Vendors
For paid bots and Digital Workers submitted to Bot Store, developers need to create the zip package using AAE 11.3.3 Client. Following this process creates a manifest file in the bot zip package which is used by the AAE 11.3.3 Control Room to define file hierarchy and code protection.
NOTE: If the zip package is not created using these steps, your submission to Bot Store will fail.
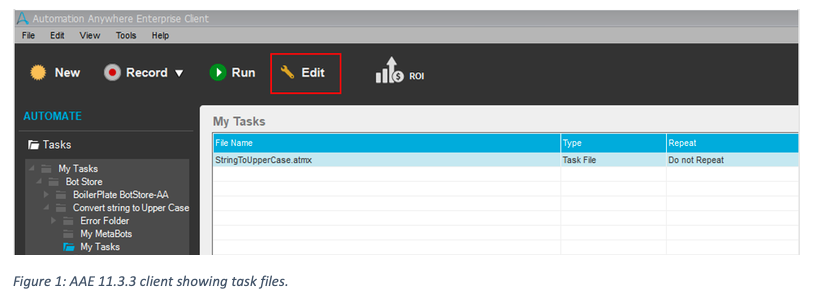
Step 1: Open one of the ATMX task files for your bot or Digital Worker in the workbench by clicking on the “Edit” button.
If you’re submitting a bot or a Digital Worker, pick any of the ATMX files for attaching dependencies.
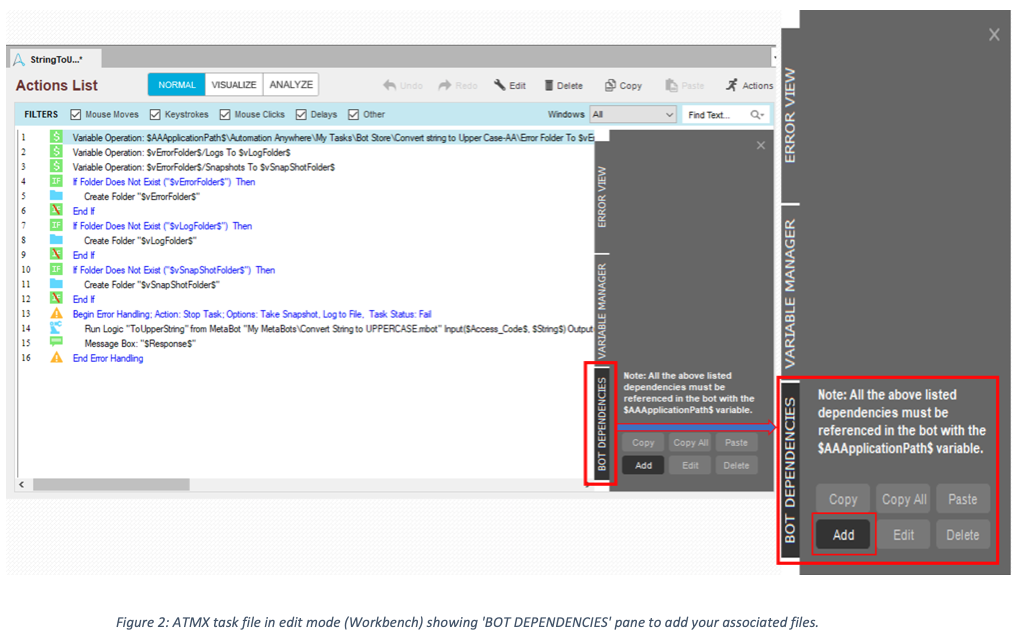
Step 2: For the ATMX file that you’ve opened, add the dependency files for your bot or Digital Worker, specifically:
- All mandatory dependency files. These mandatory files include:
- “MBOT Protection Info.txt”
- “ATMX Protection Info.txt”
- “License Info.txt”
- “Bot/DW Readme.pdf”
- Other dependencies for your bot or Digital Worker such as:
- All MetaBot files (.mbot)
- All other task files (.atmx)
- All other ReadMe documents (.pdf)
- All input files (such as .xlsx or .csv)
- Scripts or any other files that are needed to be included in the zip package for this bot or Digital Worker.
For a bot or Digital Worker having more than one ATMX file, choose one of your ATMX files and add all dependencies to that file.
- Switch to “BOT DEPENDENCIES” pane.
- Click on ‘Add’ button and add files associated with the bot package from your local drive.
- You can add bot dependencies only from Bot Store folder under My Tasks or any other sub-folder located at the AA application path.
Later, you will use this ATMX file to which you’ve attached the dependencies to generate the zip package from the 11.3.3 client.
Step 3: After adding all the dependencies for your bot or Digital Worker to your ATMX file, save that ATMX file.
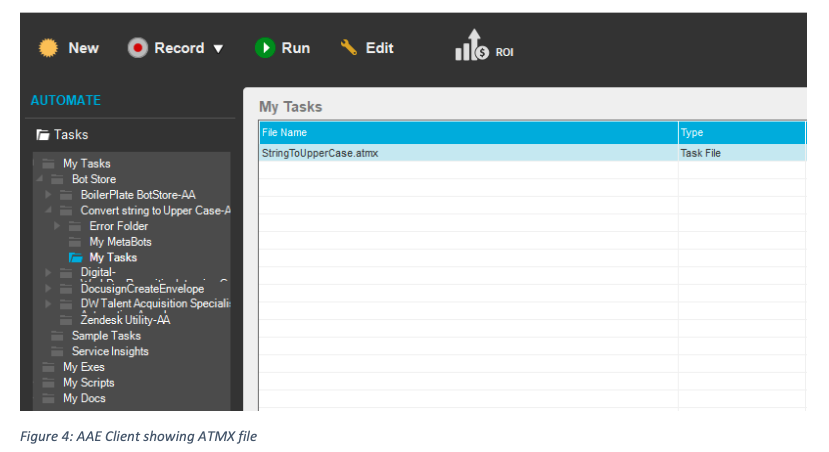
Step 4: Open “Automation Anywhere Enterprise Client” and navigate through the left pane to the ATMX file to which you’ve added all the dependencies. (The left pane shows your AA directory structure.)
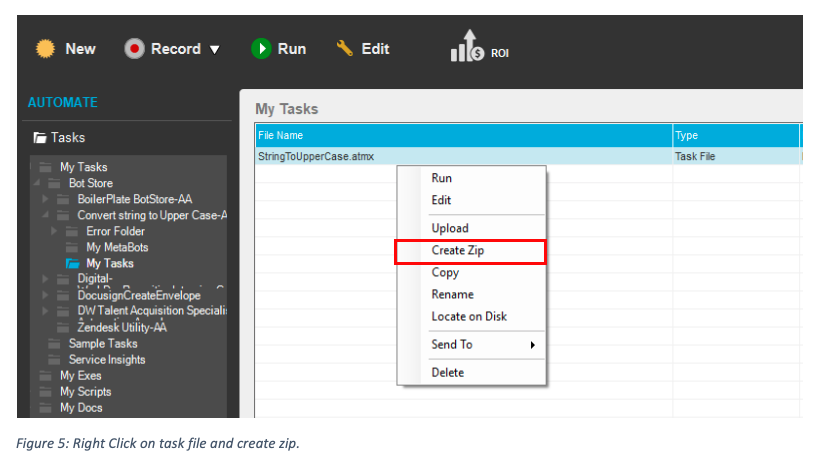
Step 5: Right click on the ATMX file with the dependencies and click “Create Zip”.
Make sure to create the zip using the ATMX to which you attached all the dependencies.
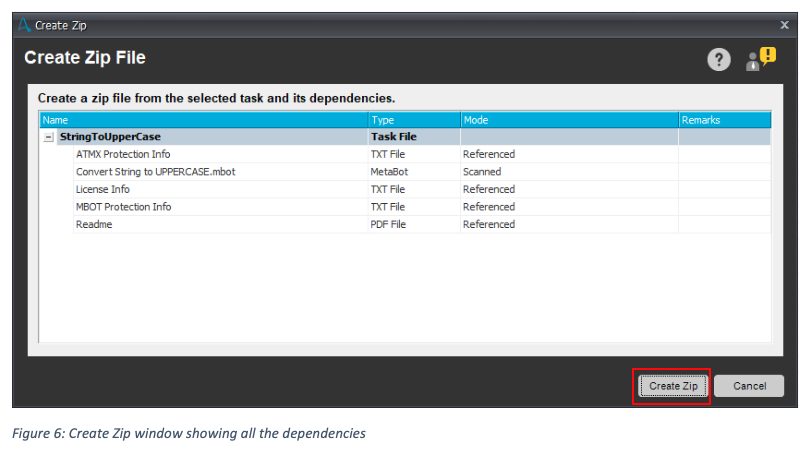
Step 6: A window will pop up showing all the dependencies associated with that ATMX file. If all the dependencies are correct, move forward and click on “Create Zip” button. If they’re not correct, go back through the above steps to make corrections.
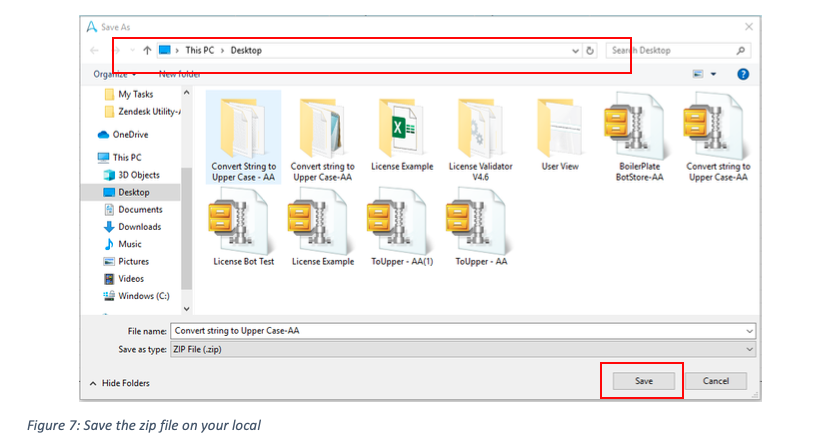
Step 7: Choose the path to save the final zip package on your local drive.
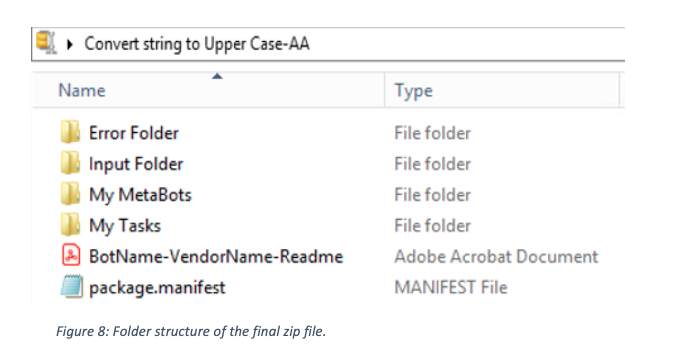
Step 8: This Zip file that you’ve created will have all the bot or Digital Worker structure plus the manifest file which will be used by the AAE 11.3.3 Control Room to define file hierarchy and code protection.
Step 9: This bot or Digital Worker zip package is now ready to submit to Bot Store.
